My love for panna cotta started when we had to make panna cotta at one of our practical classes at university.
Don’t you wish you could eat more panna cotta? Panna cotta is a good as dessert gets! Unfortunately, we hardly ever see it on menus (or maybe I just don’t eat out too often & at the right restaurants?). The other problem I have with trying something I have not eaten at a specific restaurant (in other words – the UNKNOWN) is that I am often disappointed. We went to an Italian restaurant recently and to my surprise there was panna cotta on the dessert menu. Obviously I had to give it a try. I must say the texture was great – it was really smooth, delicate and extremely light and it had that wobble to it, but the flavour was disappointing and dull. So once again, it left me feeling dissapointed.
If you are Afrikaans, most of you probably grew up with ‘flamby’ desserts – the instant crème caramel / flan packs that your mom used to make. She even had the little ‘flamby’ sets especially for this instant dessert that we all loved. Random fact: ‘Flamby’ is actually a French trademark product name owned by Nestlé and Lactalis. It is the name for a caramel custard dessert that is packaged and sold in little plastic ‘pots’. The correct word is actually ‘Flanby’.
At the restaurant one of the guests at our table asked me what panna cotta was and I had to explain it to him. When my panna cotta dessert arrived, he said: “Oh, it’s a flamby!” And I just had to laugh and sort of agree! Créme caramel is made of an egg custard that has been poured over a caramel sauce and is then cooked in a bain marie in an oven. As you unmold the créme caramel, the caramel has melted and now serves as a sauce for the baked custard. The egg serves as a thickening agent in crème caramel and sets it. Panna cotta does not have any eggs in, but relies on the gelatine to set the mixture in the fridge. A sauce for panna cotta is only added after the dessert has been unmolded.
Too much information for one day? 🙂 Okay, let’s get back to the point.
The question remained: Why have I not made my own panna cotta at home?
I don’t know why I have never attempted this simple dish ever again after university. Being autumn and all, I thought it would work well to incorporate the autumn flavours into this dessert.
A lot of times cooks are scared to work with gelatine & I can guarantee you there is no need to feel this way – it all comes down to knowing the basics about gelatine. Here are some tips:
- In South Africa we hardly get leaf gelatine or gelatine sheets, so we normally use powdered gelatine & to tell you the truth I prefer working with powdered gelatine. Powdered gelatine is easily available at most grocery shops. You can even buy larger quantities of gelatine at baking shops.
- You need to ‘bloom’ powdered gelatine. Blooming is a very important step in ensuring your gelatine is properly incorporated into your mixture and ensuring that your end product does not separate.
- You can bloom gelatine in almost any liquid, not just water. The liquid always has to be room temperature or colder. NEVER hot liquid.
- To bloom gelatine, the ratio is more or less 1 part gelatine : 2 parts liquid. Pour the liquid into a small bowl (like a ramekin) and pour the gelatine over it. The gelatine will absorb the liquid and swell, but still keeping its granules. You need to melt the gelatine either in a water bath on the stove or in the microwave. Using the microwave is way easier and quick.
- Be careful not to let the gelatine boil. If gelatine boils it loses structural integrity and it might not set. Once all of the granules are melted, remove from the heat, or stop the microwave and set aside to cool to room temperature.
- If it starts to harden before you are ready to add it to your mixture, you can just reheat it.
- Do not add hot gelatine to cold mixes. You can, however, add the hot melted gelatine straight to hot mixtures.
- It is best to add gelatine to a recipe as one of the very last steps as it will start working quite quickly if the mixture is quite cold.
Once you see how it easy it really is to prepare panna cotta, you will make it at home all the time! Once again, feel free to experiment with flavours and combinations.
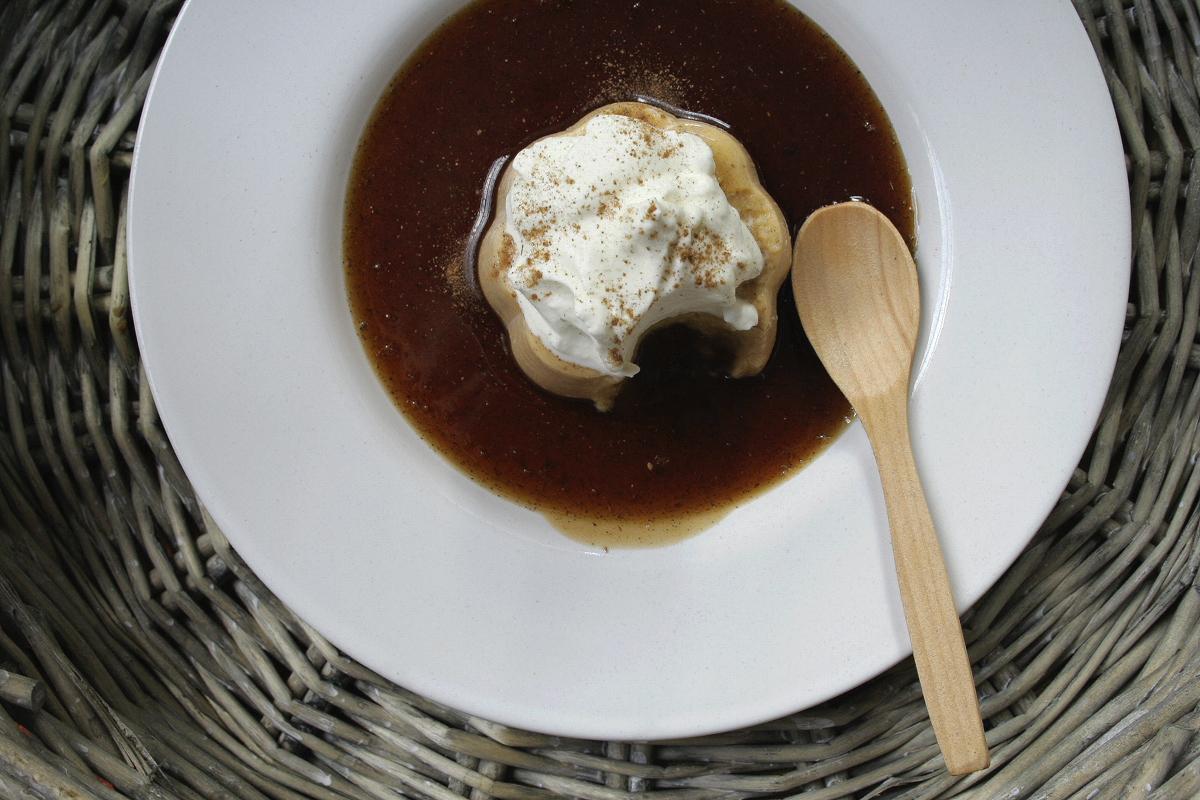
I must say that this is not the lightest or smoothest panna cotta I have ever tasted. It has pumpkin in after all, so immediately your brain should tell you that it cannot be as light as a mere honey or vanilla panna cotta, but there are a few tips to make the pumpkin as smooth as possible (please read recipe for tips). In this panna cotta’s defence I must say that it has the wobble to it and is very flavourful with all the right spices – a perfect autumn dessert.
I have made a simple rooibos syrup to serve with the panna cotta. I have also added a dollop of freshly whipped cream. The sauce is really sweet, so make sure that it is not too thick and make sure you only pour a very, very thin layer thereof.
You can make panna cotta in ramekins, dariole moulds, or if you don’t mind your panna cotta having an ‘old school’ twist, you can use your little ‘flamby’ plastic containers – the panna cotta slides out of the moulds without effort. If you are using dariole mould or ramekins, you can take a sharp paring knife and loosen the edges or you can dip the mould into hot water for a few seconds to loosen the edges so that the panna cotta doesn’t stick to the mould.


Adapted from: Pastry Affair