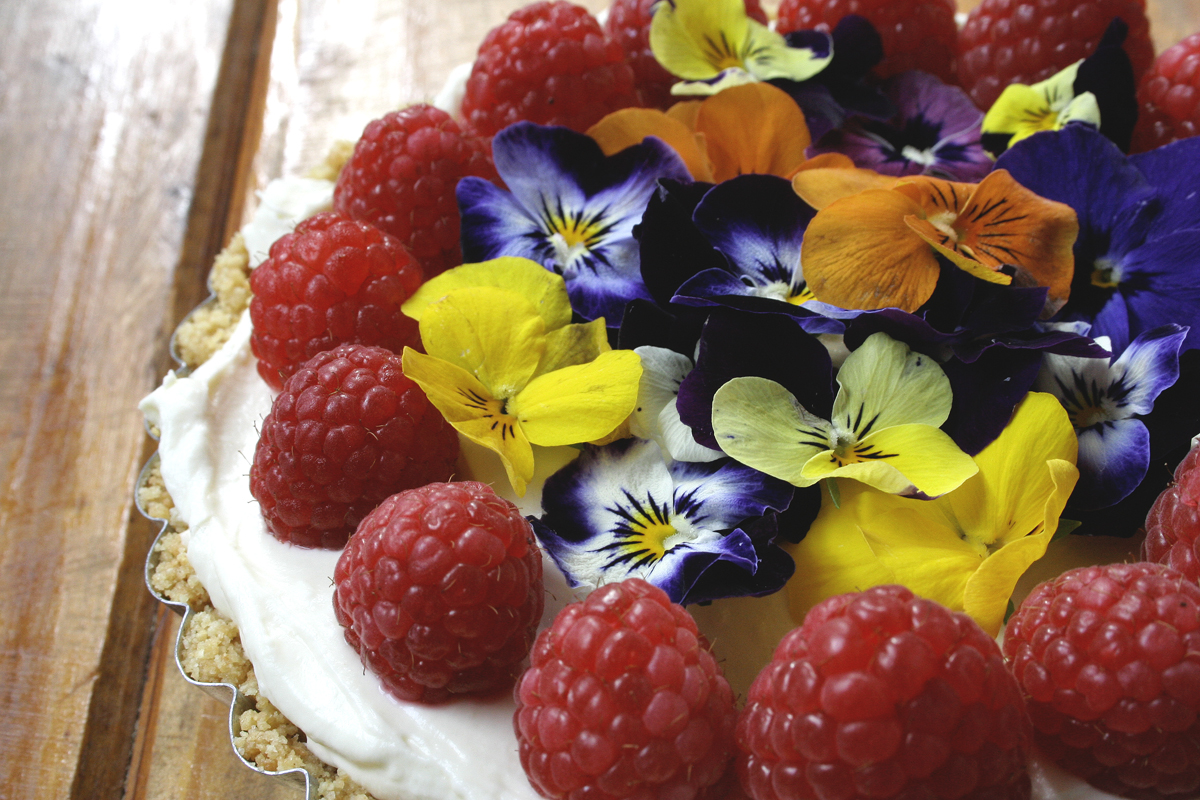
Who doesn’t love a good cheesecake? Who doesn’t love an easy-to-prepare, good cheesecake even more?
This is a wonderfully straightforward recipe that you can follow to make a winner cheesecake. All it takes is a few minutes. The bonus is that there is no baking involved, so the preparation time is so short.
Now, I’m not saying that a no-bake cheesecake is better than a baked cheesecake. They are simply different – unique and lovely in their own ways.
I think the simplest crust that an amateur baker can start with is a cookie crumb pie crust. It is definitely less stressful to make than a short crust pie shell. The salty cookie crumb crust perfectly balances the sweet and somewhat tart filling.
I used 15cm loose bottom tart pans – this is the only way to remove the tart from the pan. The trick to removing the outer pan is to carefully place the tart in its pan over a glass. The bottom will stay on the glass and the sides can gently slide off.
The filling can either be piped into the crust(s) or for a more rustic looking cheesecake, you can use a spoon to gently even out the filling.
You can decorate this cheesecake with any fresh fruit. You can also make a chocolate ganache topping, some kind of berry sauce, or a salted caramel sauce. A peanut butter sauce would also work well. The options are endless!


Easy No-Bake Cheesecake
Ingredients
For the Crust:
- 1 Packet of Tennis Biscuits (200g)
- 120g Butter
- 15ml Caster Sugar (optional)
For the Filling:
- 2 Tubs of Cream Cheese (230g each; room temperature)
- 10ml Vanilla Essence or Vanilla Extract
- 100ml Caster Sugar
- 1 Cup Cream
- Juice of 1 Large Lemon
- 10ml Powdered Gelatine
Instructions
For the Crust:
- Crush the biscuits in a food processor by using a rolling pin until fine crumbs are formed.
- Melt the butter in the microwave.
- Pour the butter over the crumbs and mix until well combined and without clumps.
- If you are making smaller tarts, equally divide the biscuit base between the 4 tart pans.
- By using your hands, press the biscuit mixture against the bottom and the walls of the tart pans.
- Refrigerate the base(s) until you use them later.
For the Filling:
- Bloom the gelatine in a small microwave-safe container by adding 4 teaspoons (20ml) of water to the gelatine. Let the gelatine stand for a few minutes until all of the water has been absorbed. Melt the hydrated gelatine in the microwave until the gelatine is completely liquid. Let it stand until it reaches room temperature. In the meantime, you can make the cheesecake filling.
- By using an electric beater, mix the cream cheese, vanilla essence, and caster sugar until it is smooth. Make sure you wipe down the sides of the bowl with a rubber spatula.
- Add the cream and lemon juice and continue whipping until the mixture builds up some volume and there are no lumps. The mixture should be stiff.
- When the gelatine has reached room temperature, slowly add it to the cheesecake mixture, whilst mixing.
- Once all of the gelatine has been incorporated, the filling is ready to be added to the tart shells.
- Transfer the filling to the tart shell(s). Smooth out the top.
- Pop the cheesecake(s) into the fridge while you decide on the topping.
- I used some fruit that I carefully placed on top.
- The cheesecake can be prepared a day in advance – the cookie crumb crust might not be as crumbly as the first day (it would have firmed up a bit). The filling itself would have also firmed up, but still has a light texture to it. If you are preparing the cheesecake a day in advance, only put the fruit on the cheesecake just before serving.


